
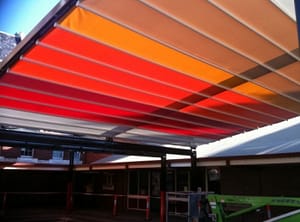
 Once you have the full size pattern for an acrylic awning, the painting involves three basic steps. While lettering an acrylic awning is not a simple and snappy as counting “one-two-three,” careful attention to each of the three steps can make the job seem fairly routine.
The three basic steps? First, you mask-and-cut. Second, you roll on the paint. Third, you add the secondary color.
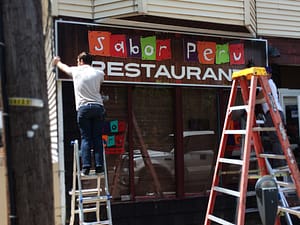
Step one-the masking and cutting-represents a critical first stage in the awning painting project. Measure and cut the vinyl material. Be sure you cut enough so that the vinyl is larger than the usage area.
Then expose the sticky side of the cut vinyl material. Spray the sticky side with a reliable adhesive. Be sure the entire area is coated. Do not try to save a few pennies by skimping on the adhesive. The coating application should be moderate-to-heavy. If the coating is too light, there will be no adhesion and the job isn’t done. If it is too heavy, the worst thing that will happen is that you will have to do some cleaning up later near the end of the job.
Spray the vinyl away from the awning. You do not want the adhesive spray to get on the awning-or on anything else that might be messed up by a sticky film. If it does go where it isn’t supposed to, then you really will have a big clean-up job later!
Wait five to six minutes. In that time, the spray adhesive on the vinyl will be setting up so that the vinyl will be ready to be applied to the designated area of the awning.
Apply the vinyl to the awning. Depending on the size of the vinyl, you may or may not need some help from a co-worker applying it to the awning. Once the vinyl is applied to the image area, be sure to squeegee it flat. Nice and flat, nice and smooth.
 Cover the vinyl with transfer tape. The tape protects the vinyl mask. If you do not cover the vinyl mask, the solvents in the flat vinyl silk screen ink will damage the mask. After several coats of the ink, the unprotected vinyl may not hold up and keep its integrity.
Once the mask is covered, position the pattern and the pounce. Taking a sharp blade, carefully cut the image. Take your time. As you know, you are cutting through the protective transfer tape and the vinyl mask You do not want to do any non-reversible cutting. You might even consider a test cut on a vinyl scrap with transfer tape on it to get a feel for the coming task. Cut and weed the entire image. Then squeegee the image to be sure it is flat and smooth.
The first of three steps are complete. Now it is time for the “painting” or more accurately the inking. This second step works out best for the awning and you if it is done in one uninterrupted operation. Once you begin to roll the ink on, you will want to roll until the graphics are fully opaque. This is a continuous process that might take up to three coats of ink.
Set up a cloth roller and your paint tray. Use a flat vinyl screen ink. This ink is best because it dries quickly, does not bleed, and is opaque and flexible. Let the ink or “paint” roll. Remember to keep it rolling until the graphics are fully opaque.
You need not worry about your mask. The transfer tape is keeping it from wrinkling and collapsing as you apply the necessary coats continuously.
Once the painting is complete-can we repeat “opaque”?-you can take a break to wait for the ink to dry. But don’t go too far because vinyl silk screen ink dries quickly.
Once the ink is dry, the end of the job is in sight. Remove the mask and check your work. If there is any dried bleeds, they can be scraped off with a stencil knife. Carefully.
 If there is any adhesive residue, you can remove it with a little lighter fluid, a clean rag, and some human “elbow grease.” (The job is nearly done-you can afford bad jokes!)
However, if customers want secondary colors and additional painting (which costs more, of course), you must take that third-and last-step.
- Get out your lettering enamel.
- First, re-mask and spray the color fades.
- Second, brush on the various colors requested.
- Then remove the masking. Be sure to check for-and to paint in-any “shadows” or outlines or other undesired effects of secondary colors or additional painting.
- Let it dry. Carefully check for any blemishes. It is better for business-and for preventing embarrassment-if you find a mistake rather than the customer. You also have an opportunity to correct it without the pressure of the customer breathing down your neck.
- There you are. The customer now has an awning with visual communication done by an expert. Only you know that it was done in three carefully planned steps: the all-important masking, the all-in-one-motion “painting,” and the only-if-you-want-it secondary painting.